Coffee When Camping: Everything You Need to Know
Home > Blog > Brewmaster Tips > Camping & Coffee > Coffee When Camping: Everything You Need to Know
Easiest Ways to Make Coffee When Camping
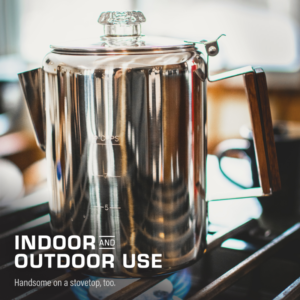
The easiest way to make coffee when camping is to use a portable stove top to either heat a kettle or coffee percolator. There are a couple of options when choosing your preferred camping coffee pot. But your biggest decision will be what heat source you’ll use to brew. The camping coffee pot we spend our most time with is the classic percolator. But we’ve also added a camping French press to our camping coffee pot catalog. As well as a disposable coffee pour-over for serving up a single cup.
If your camping pack is limited on space, we suggest a camping coffee percolator. Since they can be used directly over a campfire, and brew a bold and full-flavored pot of percolator coffee. Depending on your camp size, you can select a larger camping percolator that can serve up to a gallon of percolator coffee with every brew. Check out our largest camping percolator, the Scoutmaster, great if you’re brewing for the whole campsite.
The Best Coffee Pots for Camping
-
Bozeman, 9 or 12 cup Percolator
-
Butte, 14 cup Percolator
-
Scoutmaster, 24 cup Percolator
-
Boulder, 10 cup French Press
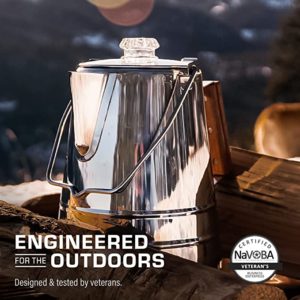
At COLETTI we set out to design, engineer, and construct the best camping coffee pots on the market. During our process we identified the most important solutions that campers needed for their coffee makers. Our line of camping coffee pots feature premium builds, quality materials, and lifetime warranty guarantees.
Built Tough for the Outdoors. Durability – Durability – Durability – First and foremost, COLETTI coffee pots are made to last. We only use stainless steel for all our parts, and glass when appropriate. Taking the time to craft a solid coffee maker, that you can feel good about bringing on your next hike, hunt, or camping trip.
How to use Camping Coffee Pot
The best camping coffee pots are either (1) coffee percolators or (2) French press. Coffee percolators are particularly good at serving up a large amount of coffee. While many campers recommend brewing with a French press due to its ease of use.
How to use a Coffee Percolator While Camping
Packing the Essentials:
- COLETTI Coffee Percolator
- COLETTI Percolator Filters
- Whole Coffee Beans
- Coffee Bean Grinder
- Portable Stove Top
Steps to Brewing with a Coffee Percolator:
- Grind your coffee beans fresh. Use a coarse ground.
- Take the basket out of the percolator base.
- Place the filter in the basket of the percolator basket.
- (optional) Wet the percolator filter with hot water.
- Add coarsely ground coffee to the basket. Ratio (1 Cup Water : 1 Tablespoon Coffee Ground)
- (optional) Bloom your coffee grounds by adding enough hot water to slightly soak the grounds. Wait 30 seconds.
- Fill the percolator base with water.
- Place the basket back in the percolator base.
- Put your coffee percolator on the heat source.
- Brew for at Least for 7 Minutes. (max 10 mins)
- Let the coffee percolator rest for 30 seconds.
- Serve and Enjoy!
Controlling the Taste of Percolator Coffee
There are a couple of factors that go into the taste of your percolator coffee. The most important factors being (1) your choice of coffee beans, (2) the water to coffee ground ratio, and (3) how long you allow the percolator to brew. Each of these factors can lead to a bolder and stronger percolator coffee. We suggest serving the coffee with a side of hot water, in order to thin out the coffee that is too strong.
How to use a French Press While Camping
Packing the Essentials:
- COLETTI Boulder French Press
- Kettle
- Whole Coffee Beans
- Coffee Bean Grinder
- Portable Stove Top
Steps to Brewing with a French Press:
- Grind your coffee beans fresh. Use a coarse ground.
- Boil water in your kettle using your choice of heat source.
- Add coarsely ground coffee to the base of your French press. Ratio (5 Cup Water : 4 Tablespoon Coffee Ground)
- (optional) Bloom your coffee grounds by adding enough hot water to slightly soak the grounds. Wait 30 seconds.
- Fill your French press with hot water.
- Brew for at Least for 4 Minutes. (max 5 mins)
- Push Plunger after brewing.
- Serve and Enjoy!
Controlling the taste of your French Press
Brewing with a French Press to make coffee when camping is fairly a simple and straightforward process. The taste of your coffee will largely depend on (1) your choice of beans and (2) the water to coffee ground ratio. Serve your French press alongside hot water or choice of milk to balance out the strength of your camping coffee.
Coffee When Camping Tips
As the campsite brewmaster, the most important factor to your coffee is consistency. Being able to find the right flavor of your choice of beans, and brewing that flavor everyday you’re out camping. The kind of coffee maker you use, and the other tools you use in the brewing process (i.g., heat source & grinder) will determine the specifics of your brewing steps.
Keeping that in mind, here our some other great tips to brewing great coffee when camping:
- Keep Your Equipment Clean
Coffee has natural antibiotic properties, so you don’t have to fully soap and soak your coffee equipment after every use. Just make sure to rinse your coffee maker completely after brewing. Once you get back from camping, you can deep wash your coffee pot with soap. - Grind Your Beans Fresh
Your coffee grounds are the base of the flavor of your coffee. While there are many coffee beans to choose from, the way you treat your beans will greatly affect the quality of your brew. Freshly ground beans retain the most flavor when compared to pre ground coffee beans. - Your Choice of Water Matters
While every campsite is different, being aware of your water options will determine the flavor of your coffee when camping. As much as possible avoid tap water, and boil fresh water if necessary. The drinking water you bring along with you should be the best choice. Avoid distilled water, while preferring filtered water to get the best flavor out of your brew.