How To Make Percolator Coffee – Stovetop Coffee Percolator
Home > Blog > Brewmaster Tips > Coffee Brewing Methods > How To Make Percolator Coffee – Stovetop Coffee Percolator
What's a Stovetop Coffee Percolator
A stovetop coffee percolator is a coffee brewing device that continually soaks the coffee grounds with the newly brewed coffee. This brewing method allows for greater control over the finished pot of coffee. As percolator coffee is hallmarked for its boldness and fullness of flavor.
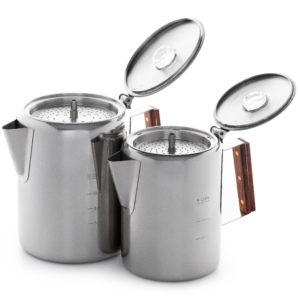
The basic components of a stovetop coffee percolator are:
- The Percolator Base
- The Coffee Grounds Basket
- The Stem
- The Top
The percolator base contains the water which will be brewed into coffee, the coffee grounds are held in a basket within the percolator base. While the stem connects the percolator base to and through the coffee grounds basket. The top of the percolator will impede the boiling water that is spouting from the percolator base and through the stem. When the boiling water collides with the top, the water is spread across the coffee grounds, essentially brewing the coffee.
How to Use Percolator Coffee Pot
- Grind Coffee Beans to a Coarse Consistency
The difference between a coarse ground and fine ground in a coffee percolator is night and day. Finely ground coffee extracts much faster than coarse ground coffee. Meaning if you’re brewing with a stovetop coffee percolator, your coffee will turn bitter much sooner with finely ground coffee beans. - Add Paper Filter to Basket
Using paper filters has been reported to reduce the amount of cholesterol in brewed coffee.
- Add at Least 1 Spoon Ground Coffee Per Cup of Water
Your coffee grounds to water ratio is the foundation to how bold or strong your percolator coffee will be. - Place Basket Inside Percolator Base
It’s important to add your coffee grounds to the basket while it is removed from the percolator base. Otherwise you run the risk of coffee grounds getting into your percolator coffee. - Screw Top to Percolator
Rising your percolator top with every use is recommended. - Add to Heat Source
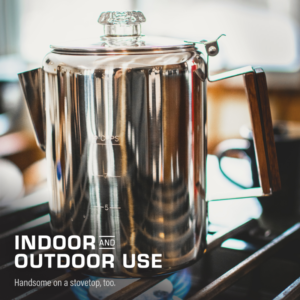
Use your choice of stovetop, campfire, or JetBoil with your coffee percolator. - Monitor Coffee Percolation
Controlling heat is important when brewing percolator coffee. The clear percolator top will allow you to see how vigorously the coffee is percolating. - Brew for at Least for 7 Minutes (max 10 min)
The longer you brew with a stovetop coffee percolator, the stronger your percolator coffee will be. A 7 minute brew will result in a well balanced coffee. - Let Percolator Coffee Sit for 30 Seconds
Allowing your percolator coffee to settle will reduce any coffee grounds that could have gotten into the percolator base. Newly brewed percolator coffee finishes brewing at boiling temperatures, use the appropriate caution when serving from a stovetop coffee percolator. - Serve and Enjoy
Percolator coffee can be served with any choice of sweetener, along with hot water or creamer to taste.
How Do You Know When Percolator Coffee is Done
Monitoring your stovetop coffee percolator is key, since you have to manually remove your coffee percolator from the heat. Otherwise you run the risk of over-extracting your coffee, resulting in bitter and acidic percolator coffee.
7 minutes of brewing will result in an evenly balanced percolator coffee. You can brew for up to 10 minutes with a stovetop coffee percolator. Any more than that your coffee will go from very bold to bitter. Using coarsely ground coffee will give you more time to brew, and is generally a more “forgiving” brewing process.
How Much Coffee Should I Use in a Percolator
The standard coffee grounds to water ratio when brewing with a stovetop coffee percolator is:
- 1 tablespoon : 1 cup
Our Bozeman 9 cup is the most commonly used size of percolator we see available today. At COLETTI, we offer stovetop coffee percolators up to 24 cups. You can underfill your coffee percolator, making note of the guidelines engraved into the coffee pot. Use the simple ratio of 1 tablespoon to 1 cup as a standard coffee brew. Reducing or adding more grounds to however strong you want your percolator coffee.
You can add hot water after you pour your percolator coffee, reducing the boldness to taste. If you’re serving coffee for someone else, providing hot water on the side is a simple way to control the coffee’s flavor after brewing.
Do You Need Special Coffee for a Percolator
You can use any of your favorite coffee beans when brewing with a stovetop coffee percolator. Since the percolator brewing method allows you to extract as much coffee and flavor you want from your beans, we suggest using a medium roast bean. A light roast bean brewed for longer can result in some interesting flavors, but generally a percolator will provide you with as much control you need over the brewing process to get the flavor you want out of your percolator coffee.
If you want to use a dark roast coffee with your stovetop coffee percolator, it’s increasingly more important to grind your beans as coarse as possible. Since a finely ground coffee will extract much faster than a coarse ground coffee. Giving you much less time before your coffee brews too bitter.
Does Percolator Make a Good Coffee
The pros of using a stovetop coffee percolator is primarily based on the control that the percolator brewing method allows for. Since you can continually brew the hot percolator coffee through the same coffee grounds, you’re essentially extracting more coffee from the grounds.
You can consistently brew strong and bold coffee with a percolator, but the consistency is up to whomever is brewing with the coffee percolator. While it doesn’t take as much skill as a espresso coffee press, the stovetop coffee percolator brewing method is generally easier to mess up than the pour over or drip coffee method.